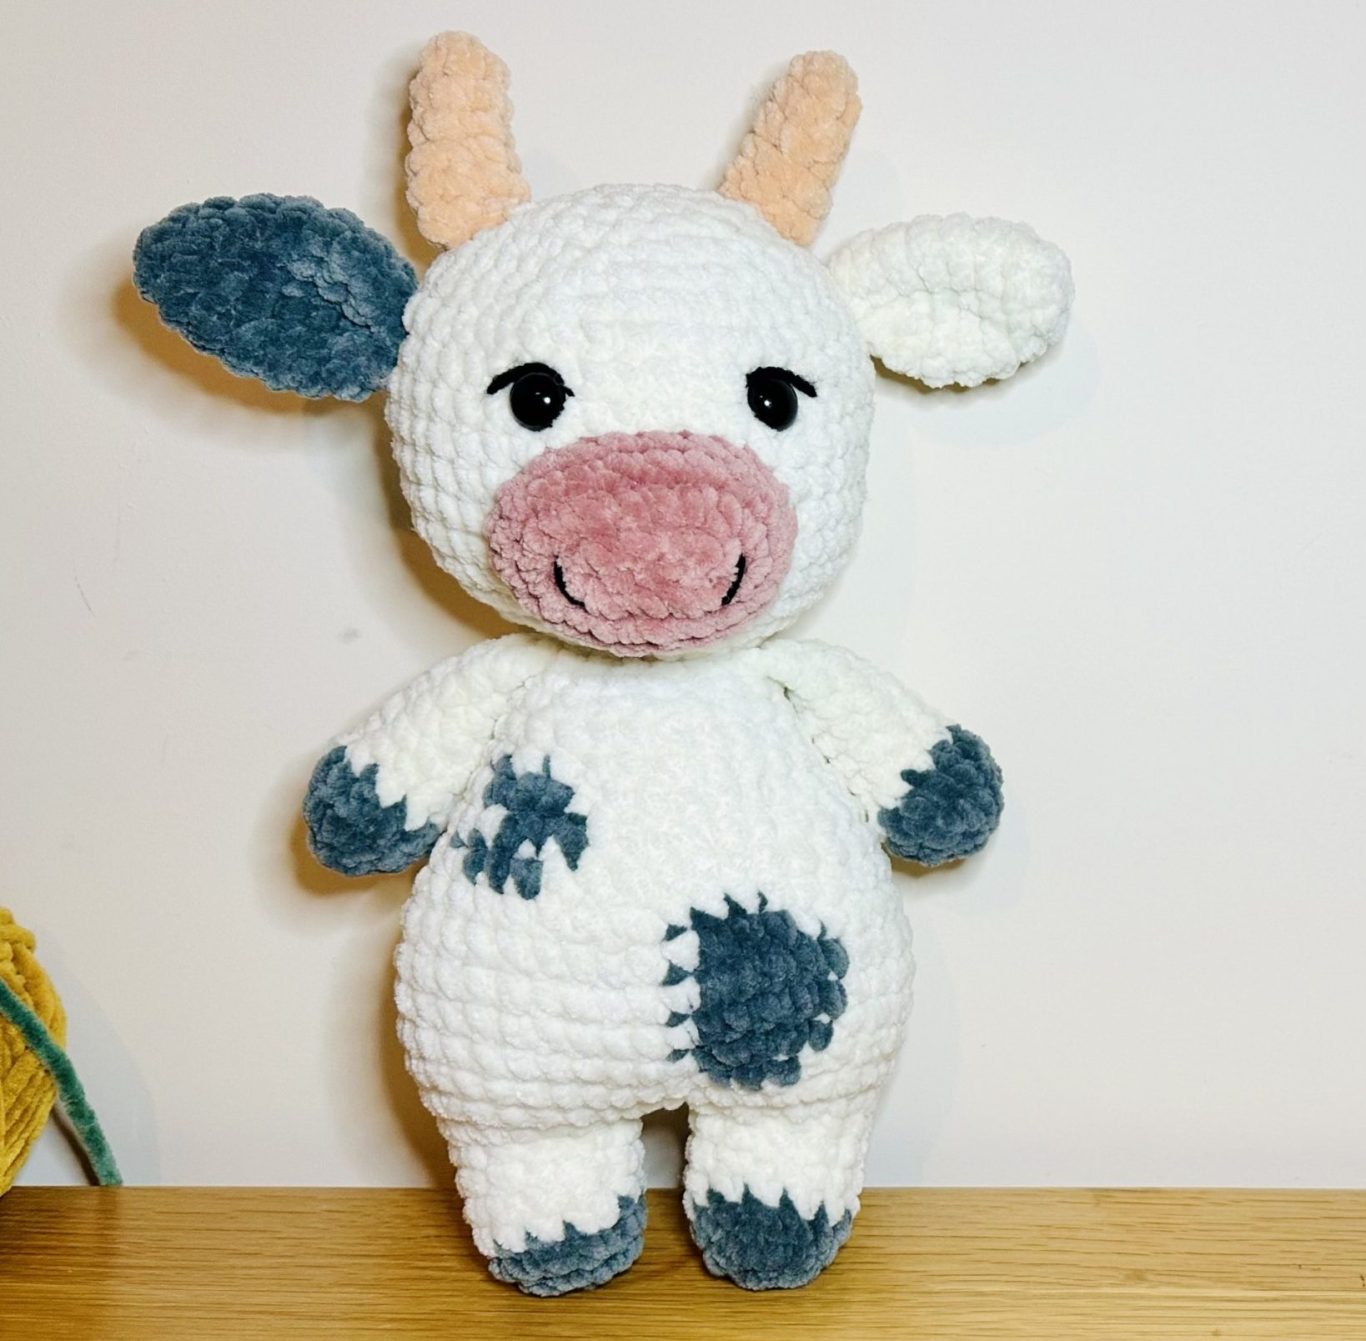
Cute Cochet cow
Materials:
• Velvet or Plush yarn in Grey and White.
• 5mm crochet hook
• Black Doble knit yarn for eyebrows
• 12mm Plastic security eyes
• Stitch marker
• Fibrefill
• Plastic nose
• Scissors
• Darning needles
Abbreviations:
• R - Round
• Ch- Chain
• Sc- Single crochet
• St – stitch
• Inc- 2 Single crochet in the same stitch
• Dec- Single crochet 2 stitches together
• (12) - number of stitches you should have at the end of the round
• ( ) * 6 - repeat whatever is between the brackets the number of times stated
Amigurumi Cow Start each component with Magic Ring, alternatively work a slip knot and chain 2, start R1 each time by working your stitches in 2nd chain from the hook.
This project requires minimum sewing. So please ensure you make the components in order they appear in this pattern.
Arms (Make 2) Start with Grey
R 1- 6sc (6)
R 2- Inc* 6 (12)
R 3- 12sc (12)
Slip stitch to fasten off Change the colour to White
R 4- (2sc, Dec) *3 (9)
R5- R10- 9sc (9) (6 rounds)
Fill the arm ¾ of the way Fold the top of the arm flat and work 4sc across.
Legs (Make 2) Start with Grey
R 1- 6sc in mc (6)
R 2- Inc* 6 (12)
R 3- 12sc (12)
Slip stitch to fasten off Change the colour to White
R4- R7- 12sc (12) (4 rounds)
Fasten off the first leg with a slip stitch. Follow the instructions to make another one of these and do not snip the yarn off and continue working on the body.
Body
R7-Work 8sc, Inc *4 around the first leg, Inc in Ch1 space, Inc *4 around the second leg followed by 8sc.
Finish the round off by working an Inc in Ch1 space from the other side (36)
R8-(5sc, Inc)*6 (42) Stuff the legs up with Fibrefill
R9- 14sc ( In White), 3sc (In Grey), 25sc (In White)
R10-13sc (W), 5sc (G), 24sc (W) (42)
R11-13sc (W), 5sc (G), 24sc (W) (42)
R12-13sc (W), 5sc (G), 24sc (W) (42)
R13-15sc (W), 3sc (G), 24sc (W) (42)
R14- (5sc, Dec) *6 (36)
R15- 20sc (W), 3sc (G), 13sc (W) (36)
R16- 19sc (W), 3sc (G), 14sc (W) (36)
R17- 19sc (W), 3sc (G), 14sc (W) (36)
R18- (4sc, Dec) *2, 2sc (W), 2sc, Dec (G), (4sc, Dec) *2 (W) (30)
R19- (3sc, Dec) * 6 (24)
Stuff the body with fiberfill as you work
R20- 24sc (24)
R21- (2sc, Dec) * 6 (18)
R22- 18sc (18)
R23- 3sc, 4sc Joining 1st arm onto the body by holding the top of the arm against your stitches on the body and working 4sc through the arm and the body at the same time. 6sc, 4sc joining the 2nd arm, 1sc (18)
R24- (1sc, Dec) * 6 (12)
Continue working on the head
Head
R25- Inc*12 (12)
R26- (3sc, Inc) * 6 (30)
R27- (2sc, Inc, 2sc) *6 (36)
R28- (5sc, Inc) *6 (42)
R29- R34- 42sc (42) (6 Rounds)
Insert eyes into the head between
R32- 33 with a 6/7 st gap. Make sure to align the eyes with the shoulders.
R35- (5sc, Dec) * 6 (36)
R36- (4sc, Dec) * 6 (30)
R37- (3sc, Dec) * 6 (24)
R38- (2sc, Dec) * 6 (18)
R39- (1sc, Dec) * 6 (12)
R 40- Dec* 6 (6)
Sew the gap on the head with a darning needle or work one more decrease and slip st in the opposite st.
Muzzle (With Peach yarn)
Slip knot and Ch6
R1- Inc in 2nd ch from the hook, 3sc in a row, 4sc in the last st; Turn the stitches over and work at the base, 3sc, Inc (14)
R 2- Inc*2, 3sc, Inc*4, 3sc, Inc*2 (22)
R3- R4- 22sc (22) (2 rounds)
Fasten off with a slip stitch.
Ears (Make 2) (One Grey and one White)
R 1- 6sc (6)
R2- (1sc, Inc) *3 (9)
R3- 9sc
R4- (2sc, Inc) *3 (12)
R5- R7- 12sc (12) (3 rounds)
R8- Dec *6 (6) Fasten off with a slip stitch.
Horns (Make 2) (with Cream Yarn)
R1- 4sc (4sc)
R2- (1sc, Inc) *2 (6)
R3- 6sc (6)
R4- Dec, 1sc, Inc*2, 1sc (7)
R5- R6- 7sc (7) (2 rounds)
Tail
Attach the yarn in the middle of the back. Ch6, 5sc in a row starting from 2nd Ch from the hook. Work a slip st at the base of the tail and snip the Yarn off and thread it into the body. Attach a few strands of standard double-knit yarn, at the tip of the tail.
Assembly
1. Stuff the muzzle with fibrefill and stitch it on the face. Refer top the picture for positioning.
2. Embroider the nostrils on the muzzle.
3. Fold the bottom of the ear in half and secure it by sewing the opposite ends together. This will give the ears the desired shape. Then sew the ears on the side of the head of this cow in line with the eyes.
4. Stuff the horns up gently with fibrefill and sew them on the head leaving a gap of ½ stitches between the ear and the horn.
5. Embroider the eyelid.
Follow the link for a video tutorial
©Copyright. All rights reserved.
We need your consent to load the translations
We use a third-party service to translate the website content that may collect data about your activity. Please review the details in the privacy policy and accept the service to view the translations.